This blog site focuses on cards and projects utilizing materials and tools from various scrapbooking and paper craft companies.
If you are interested in cards and projects made with rubber stamps from various companies, please check out my other blog site "Stampin' Inspirations".


Come and join the Christmas Group Site on Paper Craft Planet
Click on the banner below


Tuesday, October 30, 2007

More Cards for Angel's Blog Candy/Challenge

Good Morning, Folks. I've been diligently working on Angel's Sketch Challenges for her blog candy and here are a few cards I made last night. I made a few more cards using Angel's sketches posted on Stampin Inspirations so be sure to check it out.

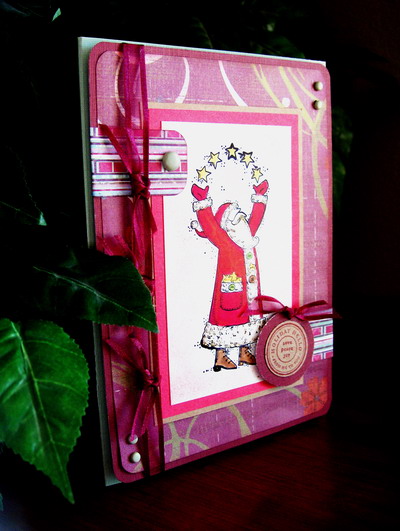
This card is for Sketch #22: Click Here for the sketch.

This is a Thanksgiving card with a little pink. Why not? Pink goes nicely with Thanksgiving. . .well, I think so.

I'm not going to include the card recipe for these cards because I simply don't have the time today. Busy, busy, busy. . .


Here is a card I made using Sketch #23: Click here for the sketch.

The flowers were cut out from a designer paper. I thought the flowers were pretty. I added a little bit of Stickles glitter to add a little bling to them.


Here's the 3rd card I created. . .no stamping on this one at all! Whoohoo! I wanted to create fall/autumn card in traditional colors mixed with non-traditional. What do you think of the purple mix? I think it's different but the card still have the essence of fall.

This card sketch is using Angel's sketch #24: Click here to view the sketch . There's 8 more days to her challenge/blog candy so be sure to drop by her blog site and try it out!

Monday, October 29, 2007

Envelope Scrapbook Album


Good Morning Folks! Boy, I've been so stinkin' busy and I'm so behind on everything! This weekend was crazy busy but it's over! Thank goodness.
Anyway. . .I managed to squeeze in time to make this "Envelope Scrapbook Album". If you haven't had a chance to stop by my "Stampin Inspirations" blog site. . .I had posted that I had recently bought a CombBind binding machine. I decided to buy the CombBind rather than a Rubicoil for various reasons. One, I already have a Bind It All binding machine and the other reasons are posted on Stampin Inspirations.
Anyway. . .this album was created using "greeting card" size envelopes (the larger size envelopes. . .is it A6? - not sure). You don't need a binding machine to create this album. You can punch holes to the side and use ribbons or book rings to bind the album together. I decided to bind the album using the CombBind.
I decorated the envelopes with designer paper and various sticker embellishments. Most of the embellishments I used are by "Jolee's Boutique". The designer papers are from DCWV Christmas Collection. After designing the envelopes, I tucked the flap into the envelope and using a 1" circle punch, punched a notch at the center top.


Inside the envelopes are scrapbook pages with a scrapbook layout. So far I made 3 pages. I plan to add more pages when I have the time to do so.

Here are the envelopes that I used to create the pockets of the album.
Until later, folks. . .today will again be a busy day! I wish time would slow down a little so I can catch up. . ..


Saturday, October 27, 2007

Busy This Weekend. . .

Life, life, life. . .it just gets in the way sometimes. I'm going to be busy this weekend and won't have time to craft or blog. I have to help out my kids with their obligations for the Key Club. My kids are officers of the Key Club and I've been appointed their offical chauffer. I'll be spending the whole weekend driving them around. Anyway. . .if I have time this evening, I'll see if I can post something.

In the meantime. . .watch this video. Anybody heard of Coblie Caillat? Anyway. . .I love her new album. She's a new upcoming singer and I love the song "Oxygen" by her. Unfortuantely, there's no video for that song but she did release a new song called "Bubbly". Amazingly, she was discovered through MySpace. Check out her new release and tell me what you think of her?

Thursday, October 25, 2007

Look Mama, No Stampin'!!


Here's another card I made for Angel's (Angelosity) Challenge/Blog Candy. I have a week's worth of catchin' up but what I'm doing is creating a card for a current sketch and the other is a catch up one. If the card is made with rubber stamps, I post it on Stampin Inspirations and if there's no stamping except for the sentiment, I post it on this blog site.
This is for sketch #8: Click Here for the sketch. This was an interesting sketch. I wasn't sure what I was going to do with it but I saw these designer papers in scrap pile and I thought it was a good way to get rid of them.
The sentiment is a vellum sticker that went really well with the theme of the designer paper. The designer paper had a bit of asian theme to it so I decided to use the "peace" sentiment to tie the theme of the card together. I really like how it turned out. The stripe paper is actually very glittery but you can't see it in the picture.
Card Details:
Paper: DCWV Glitter Stack, DCWV Value Pack
Accessories: JoAnn Brads, Provocraft Holiday Stickers, Organdy ribbon

Wednesday, October 24, 2007

Christmas Cards and Angel's Challenge/Blog Candy

Whoohoo! I'm on the roll with Angel's (Angelosity) Challenge/Blog Candy. It's been fun creating cards using someone else's sketches. This card is for Angel's sketch #6: Click here to see the sketch.


No stamping whatsoever with this card. Yay! The snowflake is a sticker that I mounted on cardstock then cut it out. I crimped the cardstock. . .remember when crimping was popular. I rarely see cards with crimping these days. Well, I decided to pull out my crimper and created the crimped background.

Card Details:

Stickers: Provocraft Winter Stickers
Paper: SU Bashful Blue, Ballet Blue, White
Accesories: DCWV Christmas Stack, SU Slit Punch, 1/8" circle punch (scallops), Big Lot Ribbon, JoAnn Brad

This card was created using Angel's Sketch #18: Click here for the sketch. I basically used the same material for this card as my first card. The only difference is the swirl clip and the silver metallic cord. I also added a different designer paper by DCWV.

Tuesday, October 23, 2007

Cards For Angel's Challenge/Blog Candy

Hey Everyone. I made two cards for Angel's Challenge/Blog Candy. Like I said on my previous post, Angel is giving out a huge prize so be sure to drop by her blog site and check out the challenge. If interested. . .click here for the rules. This card is day 5 sketch. Click Here for the sketch.

I made this card using my CB Leaves die again for the primary image. I did do a little bit of stamping because initially, I was going to post this card on Stampin Inspirations. When I was looking for a focal image, I decided to use the die-cut leaves as my primary focal point so this card ended up being posted here on Card Inspired.

You can't tell by the picture but the stamped background is shimmery because I applied Pearl Ex to the stamped images.

Card Details:

Stamps: SU Grand Cornucopia, Happy Fall Y'all
Paper: SU Really Rust, More Mustard, DCWV Fall Stack

Ink: Versamark, Basic Black, Glitter Gel Pen
Accessories: CB Leaves Die-cut, Grosgrain ribbon, Making Memories colored staples, Fiskar "Cloud" scissors


Here's another card I submitted for Angel of Angelosity's challenge/blog candy. Click here for the sketch. This sketch is for Day 2.


I created the card with a horizontal orientation but I did follow the sketch. Following other people's sketch is really fun. I should do it more often. Did you know that I have never followed my own sketches. . .like I've said in the past, I create my sketches after I create the card.


I think I'm going to create two cards for each post; one is to follow a past sketch that I created and follow another person's sketch from either a blog or SCS. Sounds like a plan. . .

Card Details:

Stamp: Inkadinkado
Paper: DCWV Textured Cardstock, SU Pretty in Pink, Old Olive
Ink: Old Olive
Accessories: 1" and 1 1/4" punch, Colorbok ribbons, Fiskar "scallop" scissors

Monday, October 22, 2007

Angel "Angelosity" Blog Candy Challenge

Hey Everyone! Angel of "Angelosity" has a huge Blog Candy/Challenge in progress right now. It's huge with lots of goodies to be handed out so be sure to check it out. Click here fore the rules.

To create this card I used Angel's Day 1 sketch. I plan to do ALL of them. I'm a bit behind but my goal is to do all of the sketches that she is posting for her challenge. I think she is on day 16 now so I really need to hustle.

Anyway. . .I created this card using 3/4" square punches and small snowflakes punches and mounted them on to the designer paper. The rest of the card was basically created to follow Angel's sketch.

Card Details:

Stamp: Inkadinkado Holiday Collection
Paper: SU Basful Blue, Brocade Blue, Provocraft Holiday Collection
Ink: Brocade Blue
Accessories: Colorbok Ribbon, SU 3/4" square punch and snowflake punch


This is a Thanksgiving Card I made last night using Cuttlebug "Leaves" dies. Die-cuts are a great way to reduce your scrap pile. I plan to start using my many dies to create cards. It's sorta exciting to work with something different besides rubber stamps although, I did rubber stamp the sentiment.

Card Details:

Stamp: Darcies
Paper: Not sure of cardstock(used my scraps), DCWV Fall Stack, SU Sage Shadow
Ink: SU True Thyme, Creamy Caramal
Accessories: CB "Leaves" Dies, Colorbok Ribbon

Saturday, October 20, 2007

Cuttlebug Die Set Flowers


Hey. . I finally found time to post these cards. I decided to create cards using the Cuttlebug die set "Flowers". I bought the dies a few months ago but never once used the set. I had bought a few dies but because I rubber stamp most of my images, I really wasn't motivated to use the dies.
I feel changing the focus of this blog has been a good thing because I'm now motivated to use other products besides rubber stamps to create my cards.
I basically cut the flowers using the CB dies and arranged the flowers on to my cards.


I created the cards using similar materials but added different elements to each card as well. Awww. . .I just realized that the ribbon looks a bit droopy with the second card. I will need to perk it up a little.
The sentiment stamp for the first card is by Studio G and the sentiments on the 2nd and 3rd cards are by My Sentiments Exactly.
The pattern paper is from the DCWV Fall Stack.


I'm so accustomed to using rubber stamps to create my designs that it's still a little hard for me to put together cards without rubber stamping. I'm still learning but it's getting easier to create cards without rubber stamps. I still rubber stamp the sentiments because it's less costly to use rubber stamps and easier to create than using scrapbook stickers or embellishment.


The flowers on this card are the "reverse" image of the dies. Rather than throwing them away, I used them to create a design for the card. I created the scallop edge using the SU slit punch. All of the cardstock are by SU. The colors used are Cranberry Crisp, Old Olive, and Creamy Caramel.


Thursday, October 18, 2007

In the Meantime. . .

Hey Everyone. . .I'm in the process of creating cards for this blog site but life is sort of getting in the way. Anyway. . .here's two videos you can take a look at. . .love these two songs because they're both touching. . .check them out!


Here's one from Pink. This is currently my favorite song by her.

Tuesday, October 16, 2007

Altered Mixed Nuts Containers - Fall Thanksgiving Theme


Hi Everybody! For several months, I've been collecting empty plastic containers that originally contained mixed nuts and other snacks as well as soup cans. I had set them aside in the kitchen and last week, I noticed they were gone. They were great containers and I was planning to alter them to create decorated snack containers during the holidays.

I asked my husband where he had placed them and he said "oh, the empty containers?". . .I'm like "Yeah! The empty contaners!!!" He's like "well , I thought they were trash and I had thrown them away." WHAT! WHAT! "No way. . .did you just say you threw them away. . .you gotta be kidding me?". . .he's like "yeah, I didn't know that you wanted to keep them". OMG!! I couldn't believe it.. I'm really bummed out that he threw the containers away. I had grand plans for them.

Anyway, here are a few stuff I altered today. I found these two mixed nuts containers that still had the mixed nuts in them. It worked out in the end. I was able to alter something but it would have been nice if I had the empty ones.

I decorated the containers for the Thanksgiving/Fall Season and the soup cans shown above are for Halloween. Looking at the picture, I don't like how the Raffia looks. It looks messy but in person they actually look really nice because it has the essence of the Fall season. I created them really quickly. . .both within an hour. I'll make better ones next time.

If you want a closer look and details of the altered soup cans with the lollipops, visit my Stampin Inspirations blog site. I posted them on my other blog site because rubber stamping is involved.

If I can find other containers, I'll make more of these and come up with something a little prettier.

Until later, folks?

Sunday, October 14, 2007

Another Mini Scrapbook Album

Good Evening Everyone! Am I scrapbooker now. . .did I abandon card making and rubber stamping? No. . .all my "rubber stamping" projects are all now being posted on my Stampin Inspirations blog site and all "papercraft" projects on Card Inspired.

I'm still making cards for Card Inspired but it will be cards using paper craft materials as opposed to "rubber stamps". I do still do some rubber stamping on my "paper craft" projects but it's only limited to the sentiments because the truth is I don't have too many "sentiment" stickers and I don't want to have to type and print them out all the time so rubber stamping the sentiments is the easiest and fastest way to do it.

So why are you seeing a lot of scrapbooking on Card Inspired? Here is how I see it. . .since I've started crafting I've rarely kept any of the things I create especially handmade cards. I either swap them, RAK them, or sell them. I never get to keep any of my stuff. . .why should I keep them. . .cards are meant to be given away, not kept.

Scrapbooking and making different projects besides cards are stuff that I can actually keep for myself. Furthermore, I have all these pictures stored in my computer and nobody gets to see them, not even my kids or husband because they're all in my computer. I could do an online photo gallery so they can access the photos but I don't want to do that. The best thing is to print the pictures and create albums so they can look at the pictures. They get a kick looking at pictures of themselves, especially when they were younger. The pictures bring back wonderful memories for all of us.

Anyway. . .the scrapbook album is a mini album created with thin chipboards covered with designer papers and cardstock and embellished primarily with stickers. It was really fun making this mini album but the final album wasn't what I originally had planned to make. The album was suppose to be a vertical flip album that opened up with a stand in the back of it so I could display it in the living room. Unfortunately, without thinking of the orientation of the album, I had laid the photos out in a manner that requires that the album be opened horizontally. When I finally was going to attach it to the flip stand, I realized that the orientation of the photos were done horizontally by mistake.

I wanted to scream!!! No problem. . .I can make another one but the next one will be a "Christmas" album. All is not lost, I punched holes to the side of the album and created a traditional horizontal binding with book rings instead. The album is 5.5 x 5.5" with a total of 10 photo pages.

Materials: 5.5 x 5.5" chipbord, 2 Book (leaf) rings, DCWV Fall Designer Paper Stack and DCWV Textured Fall Cardstock. Stickers on the front cover are all by Jolee's Boutique. All ribbons on the album are Ribbon Rubons, Grosgrain Ribbons, and Organdy Ribbon. Stickers and materials are listed below for each page.


All of the photos were taken in 2003. I chose these photos for this album because we were all dressed up for Halloween. Typically only the kids dress up. We've dressed up in previous years but this is the only year that I have a "group" picture of us.

Materials: Jolee's Boutique, Dress it Up Scaredy Cat, Colorbok Doo-Dads


I was dressed up as "Foxy Cleopatra" from the Austin Power movie. . .I thought DH was a "frankenstein" but he corrected me and said he was a "zombie". On the album, I had stated that he was a "frankenstein". Oops.

Materials: Jolee's Boutique, SU Slit Punch, 1/8" punch


Materials: Dress It Up Scaredy Cat, Colorbok Doo-Dads Spooky Tags, Provocraft Alphabet Punch Out, Jolee's Boutique


Materials: Jolee's Boutique, SU Slit Punch


Alexis was "Samora" from the movie "The Ring" and Anton a "Devil". I had captioned on the album that he was a Dracula but when I showed them the album, they corrected me and said he was a "devil". Okay, he looks like a dracula with horns in my opinion so I guess he was a "Devula".

Materials: Jolee's Boutique stickers, Dress it up Scaredy Cat, Colorbok Doo-Dads


Saturday, October 13, 2007

A Whole Bunch of Christmas Cards I Made Today


Good Evening, Everyone! I created these Christmas cards today. . .again, trying to get rid of my scrap pile and I'm doing a good job so far. A great way to get rid of scrap designer papers and cardstock is to punch them using a sqaure punch and creating gift boxes. Just top it off with a ribbon and whala, that's it! This is a fast and easy way to create a design for Christmas and Birthday cards! No stamping was done on this card except for the sentiment. Stamping the sentiment was faster than looking for a sticker that matched the colors of my card.


Card Details: K&CO Designer Paper, Provocraft Holiday stacks, Making Memories eyelets, 1 1/4 square punch, organdy ribbon, stitches created by sewing machine, SU Cardstock: Pretty in Pink and Old Olive, SU Old Olive ink, Inkidinkado Holiday Stamp set


I made these three blue Christmas cards because I wanted to use up my fat pile of blue cardstock and one of the scrap designer paper that's been sitting in my scrap pile. I also wanted to use up an opened pack of stickers that has been sitting in my scrap pile for 3 years. . .yup, 3 years. I have a lot of open packs of left over stickers waiting to be used.


Card Details: Stickopotamus Vellum Snowflakes Sticker, Organdy Ribbon, CB Embossing Folder, Stickles Glitter, Provocraft Holiday Stacks, SU Cardstock: Bashful Blue, Ballet Blue, Whisper White, SU Ballet Blue ink


Card Details: Stickopotamus Vellum Stickers Snowflakes, CB Embossing Folder, SU Bashful Blue, Bordering Blue, Ballet Blue, Whisper White, Provocraft Holiday Stack, Stickles Glitter, SU Ballet Blue ink, Organdy Ribbon, Inkadinkado Christmas Sentiment stamp set


Card Details: Stickopotamus Vellum StickersSnowflakes, SU Cardstocks: Ballet Blue, Bordering Blue, Bashful Blue, Whisper White, Provocraft Holiday Stack, DCWV Designer Paper, Fiskar "Scallop" Scissors, Stickles Glitter, 1" and 1 1/4" circlue punches, JoAnn Brads, Organdy Ribbon


Friday, October 12, 2007

Daily Special - Anything But Cards - Mini Coaster Album

Good Evening Everyone! Today's Daily Special is "Anything But Cards - Mini Coaster Album/Holder". I created this album holder using cardstock and designer paper. I wanted to create an album holder to store my mini album so I came up with this holder. I need to tweak it a little but I think it came out pretty well. The only snag in the process is that I made the mini album a little too bulky. The album holder is 5.5 x 5.5". The diameter of the album is 3.5 x 3.5 which fits into a CD Envelope inside the holder.

Anybody interested in a tutorial of this project? If there's enough interest, I'll create a tutorial.

Comment on this post if you're interested in a tutorial for this project.


The envelope that holds the album is a CD sleeve/envelope. I cut a 4" inch circle on the designer paper and adhered it to the front of the CD envelope.


I didn't have a vintage colored prima flower so I rubbed Tim Holtz Distress Ink on to the large prima flower to give it a "vintage" look.

Materials: Target large prima flowers, Office Depot swirl clip, JoAnn Brad, Artsy Collage Metal Collection, 3 1/2" coasters, Autumn Leaves Designer Paper, Tim Holtz Distress Ink, 3/4" Book Rings


On my birthday. . .celebrating at Nick's Fish Market in Hawaii.

I found the poem on one of my scrapbook programs. It's a poem by Hallmark. I stamped the journaling lines using SU Journaling Fun stamp set and I wrote the poem with gel pen.

I read that it's important to sometimes write the journaling rather than typing it because adding your own writing personalizes your album.

Materials: Office Depot swirl clip, Gold Organdy Ribbon, Got Flowers Prima Flowers, JoAnn Brads, Black and Beige cardstock (unknown), SU Journaling Fun


July 4th photo.

Materials: Making Memories Definitions, Office Depot Swirl Clips, Organdy Ribbon, SU Cranberry Crisp Cardstock, Black Cardstock


Picture was taken during our Chicago trip. . .we were riding in a horse carriage when this picture was take.

Like the first page, the poem is by Hallmark.

Materials: Got Flowers Prima Flowers, JoAnn Brads, Black and Brown Cardstock (Unknown) , SU Journaling Fun


At home in Hawaii. DH's birthday.

Materials: Making Memories Definitions, JoAnn Photo Holders, JoAnn Brads, SU Cranberry Crisp, Black, Got Flowers prima flowers

First Non-Rubber Stamping Card!


Hey Everyone! Here are cards I made for this new transition to my blog sites. I made these paper-craft (non-rubber stamping) cards last night. This is a FABULOUS way to reduce your scraps of cardstocks that you have piling up in your folders or drawers. The measurement of the tree is outlined on the sketch below!

To decorate the tree, I just used stickers from Stickopotamus. If you don't have ornament stickers, you can also punch out circles and squares using paper punches to create ornaments. I'll create a card next time using punches. I did do a little rubber stamping on the cards because I didn't have a sentiment sticker that fit into my design so I rubber stamped the sentiments.


If you haven't read my post regarding changes on my blog sites, click here. It'll explain what I'll be doing on this blog site as well as Stampin Inspirations. If you are a rubber stamper, visit Stampin Inspirations . . .I posted a few rubber stamped cards this morning! Check it out.


Card Details:

Paper: (1st card) DCWV Textured Cardstock, SU Cardstocks: Real Red, Old Olive(2nd card) DCWV Textured Cardstock, SU Cardstocks in Old Olive, Bashful BlueAccessories: Stickopotamus Stickers - Christmas Tree, Trim it Up Gold Mettalic Cord, JoAnn BradsSentiment stamp: Inkidinkado


Thursday, October 11, 2007

Whoohoo! New Domain is Up and Running - Compiled Sketches

Hey Everyone! My domain is finally up and running! Whoohoo! What does it mean? Well, all my tutorials are now on the new domain. All I need to to do is link ALL of my tutorials on both blog sites to the new domain. I will have to do this slowly because well, it'll take quite some time to go through all of my posts and see which ones have links to tutorials. It'll be a daunting task and I'll be so glad when I'm done.

Did you know that it took a total of 48 hours straight to upload all of the contents of my tutorials and compiled sketches? Gosh, my computer was working overtime. I couldn't really comment on anyone's blog sites for 2 days because it would slow the upload of the pictures on to the website. The pictures from my compiled sketches is what took forever to upload. I think my computer had to upload over 2oo pictures. My computer worked hard. . .luckily I have a fast computer.

Anyway, just as a starter. . .if you have any of my compiled sketches on your favorites, please change the links to the new URLs. Click on each month and save the URL on to your favorites and remove the old links. The old URLs no longer work.

January/February Sketches
March Sketches
April Sketches
May Sketches
June/July Sketches

I still need to compile August and September. I'll try to finish it by Sunday!

My Tutorials Are Currently Disabled

***Update***

This post will remain at the top until I can update all of my tutorials with the new domain. My new domain will be active in 3 days and my tutorials will be accessible again!! Yay!! Please scroll down for new posts.

Hi Everyone! Currently all my tutorials are disabled because I need to change the domain of the website that contains all my tutorials so if you have any of my tutorials on your favorites or links, I apologize but none of them will no longer link to my tutorials. I'll let y'all know when I'm able to activate a new domain and will change the links to the current domain.

I'm sorry for the inconvenience.

Changes to my blog sites

Hey Everyone! Here's the deal. . .there's going to be a few changes to my blog sites. Stampin Inspirations blog site's focus no longer will be "just" Stampin Up images, it will be all stamping products creations meaning, I will post cards that are made from different companies as well as Stampin Up.

Card Inspired will change to "scrappy creations" but I will continue to keep the name "Card Inspired". What does this mean for Card Inspired. . .well scrappy inspirations will be cards and projects made with paper products such as scrapbooking embellishments, designer paper, stickers, die-cuts, etc and Stampin Inspirations will be devoted to rubber stamping.

Both Card Inspired and Stampin Inspirations will continue to have daily sketches as always but the product focus will be different. If you love rubber stamping and subscribe for the daily feeds, I recommend that you subscribe to Stampin Inspirations. If you also love creations made with any type of paper products, I recommend you subscribe to both.

I've always kept Stampin Inspirations focused on only Stampin Up images but I think this change will be the best for me creatively. I was going to start a new blog for "scrappy creations" but I felt having three blog site is too much work.

Anyway, I hope you continue to visit my blog sites and stick around as subscribers. This change will be a positive one because I've been wanting to expand myself creatively and I think by doing this I'll be motivated to do so. The changes won't be immediate. . .I'll transition within a week or so.

Wednesday, October 10, 2007

Flash Back Wednesday - Christmas Card


Good Afternoon Everyone! This card is a card I made last Christmas and I wanted to bring it to the present. Why? Well, I like the layout so I decided to post it rather than creating another card. I actually didn't make a sketch of this card when I posted this card last year.

Someone asked me where I get my sketches. Well, I get it from me. Ha! I actually make the sketches after I make the card. I don't follow my own sketches. I usually create a layout by fitting the images and elements like a puzzle. I usually place the sentiment last because some sentiments just don't fit nicely into the puzzle.

When I create a card, I'll stamp an image and from there, the design evolve. It's all about the image. The rest of the stuff are fitted in. . .again, like a puzzle. When I'm done and I've taken a picture of the card, I then create a sketch and post it for all of you to use if you care to.

Until later folks!!

Random Card - Project Reduce Scraps


Whoa! Holy cow that's bright. . .yeah, I hear yah!! LOL! I'm just trying to use up my scrap pile and well, I have a whole lot of orange cardstock to use up. Did you see my cardstock scrap pile? If not, scroll down and you'll see that I have a lot of scraps to use up.

Despite it's brightness, I like the card because I feel "happy" when I look at the card. I mean you can't help but feel happy with all the bright colors.

The front of the card is actually a pocket with the tag inserted.

This is the card with the tag removed. It's pretty plain without the tag but it was fun to create a pocket in the front of the card.


Card Details:
Stamps: TAC, Studio GPaper: SU Only Orange, DCWV Glitter Stack
Ink: Prismacolor Markers, SU Pumpkin Pie
Accessories: 1" circle punch, SU designer label punch, JoAnn brads, 1 1/4" and 3/8" square punch (photo corner), Making Memories Ric Rac Ribbon, SU Ticket Corner Punch