This blog site focuses on cards and projects utilizing materials and tools from various scrapbooking and paper craft companies.
If you are interested in cards and projects made with rubber stamps from various companies, please check out my other blog site "Stampin' Inspirations".


Come and join the Christmas Group Site on Paper Craft Planet
Click on the banner below


Thursday, November 30, 2006

Cocoa Packet Pocket

I'm not sure what the name of this technique. . .I'll just call it "Cocoa Packet Pocket". Oh this is so fun. I learned to make it a the Stampin Up workshop. Oh, so cool. I have another sample on a previous post.


I made this one last night. I think I'm going to make a bunch of them. I heard you can do one for popcorn packets. Great idea!!


I'll post the card instructions later. Check back. I made a few other cards last night using a different technique. I'll post them on a new posting.
Until later. . .

Wednesday, November 29, 2006

2 Christmas cards I made last night

I actually have other Christmas cards that I made from the previous week but I don't want to post them all. I'll just add those to my slide show but these are the two I made last night as well as the cards from the last 3 previous post.

The first card was created using a sketch and the other one was just a random card I made.


Big Buckle Technique

Click on the post title and it will link you to the tutorial for the "Big Buckle" technique. Again, like my previous post the Word Window punch was used. I like this punch. Cursor to the right side of my blog and look for the heading "labels". . .click on "Word Window Punch". This will show the different post using this punch.


Waterfall Technique

I made another card using the "waterfall technique". After making it the first time, I realized how easy it is to make. I plan to make a bunch more of these using different stamps and different size waterfalls. See previous post to click on the instructions or cursor to the right side of my blog page and click under the heading "labels" - Waterfall Technique.


The most important component of this technique is that the strip needs to be 9 inches long if you are creating a standard size card (4/1/4" x 5 1/2") and the "mechanical" component of the strip that holds all the images need to be scored at 2", 2 3/4", 3 1/2", and 4 1/4". The width of the strip can be any length depending on the width of your images.

The pull tap is created using the Word Window Punch folded in half and inserted into the hole. A ribbon may be used as an option in place of the tab shown below.

This card shows the seasonal changes with the final image showing a snowman.


Other Technique Using Word Window Punch

I don't know the actual technique name for these cards. The dynamics of these 2 cards are that the circular image spins around from one end to another through the area that was punched with the Stampin Up Word Window Punch. Pretty innovative and very, very easy to make. When I have the time, I'll write the instructions.


Found a Stamping Buddy

Whoohoo! I found a stamping buddy. I've lived in Temecula for 1 year now and I was at lost as to how to find someone to stamp with. I thought the only way was to attend workshops or stamp camps but I didn't want to pay a fee just to stamp with people. I tried to get my neighbor to become interested in it but she didn't take me up on my offer. In Hawaii, I had co-workers, friends, family but since I'm not working yet, well. . .it's pretty difficult to find someone who may be interested in stamping. I asked the girl who works at the Hawaiian restaurant near my home if she rubber stamped and she said that she just don't have the time. Okay.

Rubber stamping don't require other people. . .I mean you don't need a group of people to make cards but sometimes others have ideas or inspirations that may be helpful and it's like any activity, it's much more enjoyable doing it with others.

Anyway, just wanted to share my thoughts.

Until later. . .

Tuesday, November 28, 2006

Cards from the Stampin Up Workshop

Here are the cards I made from the Stampin Up workshop I attended. I saw the snowman waterfall card on splitcoast stampers and although, I wanted to make the card myself, it appeared too time consuming. It actually wasn't complicated at all. The other snowman card is actually a pocket with cocoa pack tucked inside of it. If you pull on the ribbon, the cocoa rises out of the pocket. Really cool. Click on the post title for the "waterfall" instructions on the Splitcoast Stampers website.


Sunday, November 26, 2006

Back to Stamping

Returned from Vegas yesterday. Back to stamping today. Gosh the holiday season is coming fast. . .Thanksgiving is already gone. I need to work on as much Christmas cards this week. It's a little frustrating. . .I wish I started on making Christmas cards sooner.

Until later. . .

Tuesday, November 21, 2006

Vintage Christmas


Vingtage designed Christmas cards are a great variation from the traditional colors of Christmas. Vintage and distressed designed cards are very popular at this time. . .many card makers are really into the old aged appearance of cards.

Although it's popular with cardmakers, I'm not sure if it is for card buyers. Many don't like the non-traditional colored Christmas cards. The regular red, green, blue, and gold colored cards, I find sell faster than my purple, pink, and olive colored cards. I'm not sure if it's because the non-traditional colored cards are difficult to match with wrapping paper and such.

The patterened paper I used with these cards are made by Provocraft. Provocraft have recently bought into the vintage craze and have been selling scrapbook papers that appears distressed or victorian.

I love it personally. The vintage card designs are targeted more for adults than it is for children. But. . .adults, just as much as children, enjoy receiving cards as well, so why not?

Monday, November 20, 2006

Lazy Stamper

I consider myself a lazy stamper. I'm not big on technique. I make cards with very little focus on the technique. . .it's whatever comes to mind. I have difficulties following instructions and I have very little patience for them so I tend to do what I want. Besides, creativity should come from within and your willingness to explore on your own.

Interestingly, I've created cards and people would ask me what technique I used and I'll say "what technique?" or they'll say "oh, you used so and so technique". . .I'm like, "wow, really". . .I thought it was something I did all on my own. . .I didn't know someone already claimed the technique and actually named it. Oh, well.

I've seen many cards using various techniques and I love them but I just can't get myself to take the time to read up on whatever techniques were used. I'm sure if I did, I could create very beautiful cards. I think for the new year, I'll work on techniques and create one card a week using a different technique each time.

Sunday, November 19, 2006

Plans For the New Year

I started making Christmas cards sometime in October and I found that it was too late. My goal was to use all of my Christmas rubber stamps this year and I didn't meet that goal. I think I'm going to make at least 10 Christmas cards a month so I'll have a bunch in stock next year without having to rush and consuming all of my time.

It's been fun but I found that I ended up a bit burned out and am very tired. I'm planning to return to work in January and obviously, won't have time to sit and make cards. I'm going to start making Valentine cards in December whenever I have the free time.

We'll see how it goes.

Until later. . .

Using Scrapbook Pieces to Enhance a Card Design


The snowflakes are scrapbook pieces by Jolee's Boutique. I sometimes add scrapbook pieces to enhance my cards. The trouble with scrapbook pieces is that it can be an expensive addition to the cost in making a card. If it works, I say add them but it's not worth buying a scrapbook piece that cost more than $2.00. I believe the beauty of creating handmade cards are that they cost less overall in materials than store sold cards and they are unique and one-of-a-kind. When you start to add expensive scrapbook pieces, then it's no longer worth the cost. Jolee's carry a wide variety of scrapbook pieces that appear "handmade" - no one will know that you didn't make the pieces yourself.

For those interested, the stamp is Stampabilities Snowman Marshmallow.

Saturday, November 18, 2006

Collage Cards


Collage cards are not for everyone. I like it but in my opinion, it's more difficult to come up with a design for collage cards than for regular cards. Although it may appear that collage cards are just sort of slapped together without any thought to design, it actually takes a bit of creativity to put something together cohesively. It's not about slapping any image on a piece of card.

Collage cards are a great way to rid of left over alphabet stickers and scrapbook pieces. This card was created by using a "vintage letter" background then distressed around the edge using Tim Holtz distress ink. The "stamps" are actually scrapbook stickers by K&Company.

I've made a lot collage card. When I have the time, I'll upload pictures of a few of them.

Until later. . .

Product Review - Stampin Up Perfect Layers


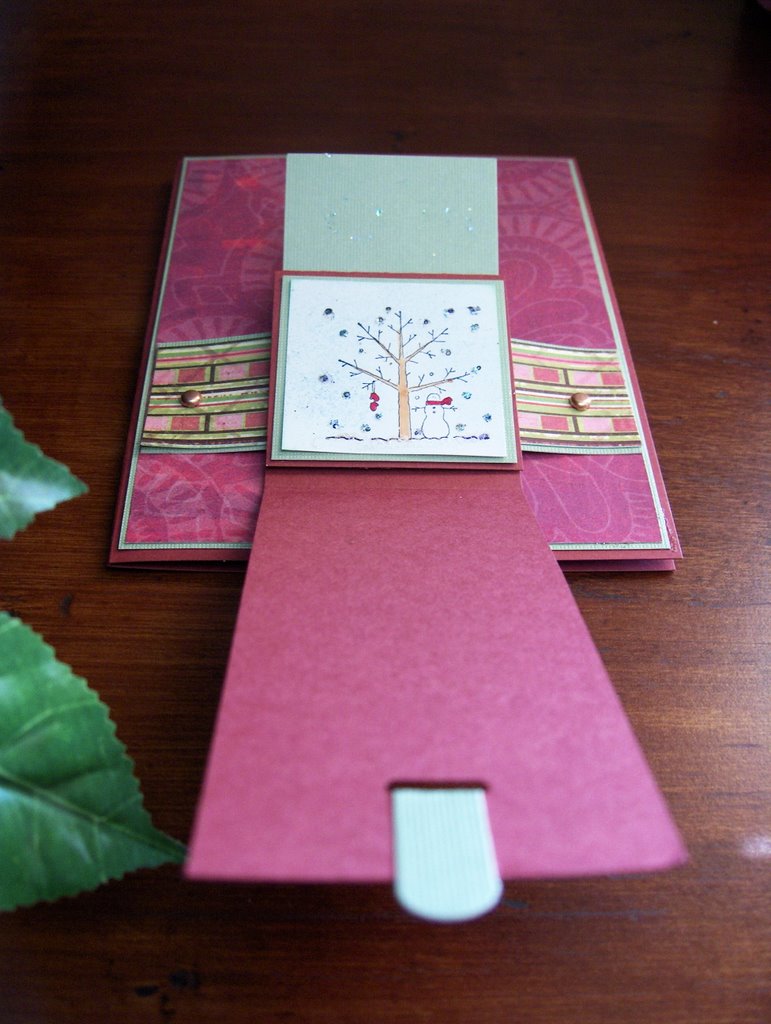
Okay, I tested it out. The jury is still out on this one. It does work as promoted. I was able to cut a straight mat alongside my rubber stamped image. I'm not sure if just cutting with a paper cutter is actually more convenient.

I initially used a swivel blade because that's what I had immediately on hand. Well, it's not meant to be used with a swivel blade. It worked great with a regular straight blade BUT it's very important that you have a sharp blade otherwise, it's difficult to cut straight. Secondly, your mat has to be a good one. Like the blade, it won't cut a straight even line if you don't have a good mat.

Last of all, you will need to make sure the ruler don't move while you're cutting otherwise, like any situation that a blade is used, it'll cut along the edge of the ruler whether it's straight or not.

I do have to admit, my mat looked a lot more even compared to just cutting it with a paper cutter because it follows along the edge of your photo or image/cardstock. If your photo and image was crookedly cut, well your mat will be even alongside your photo or image but it'll be as straight as any photo or image you used as your guideline.

I rate it a 7. Worth the $20 if you really care to have an "exact" edge to your photo and image. Not worth it if a little uneveness don't matter much to you.

Stampin Up Perfect Layers

Whoohoo! Received my Stampin Up Perfect Layers. I haven't used it yet but I'll try it out tonight and I'll do a product review. I bought it because I wanted to see if I can get a cleaner edge to my card layering. I typically eye-ball the edge and cut but I've seen cards with perfect looking edges and found out they used the Perfect Layer. We'll see. There doesn't seem to be much to it. . .just a see through type of ruler that you cut along the edge using a craft knife.

Until later. . . .

Pencil or Chalk (Pastels)

Until I discovered chalks or otherwise known as pastels, I watercolored or used colored pencils to color in my images. Although watercoloring is a fast and easy way to color stamped images, I do have a few issues using this medium. First of all, unless watercolor paper is used, the vibrancy and full effect of watercoloring is lost. Watercolor paper is ideal for watercoloring but it is expensive. If regular cardstock is used, layering the colors become a problem if a watercoloring medium is not used because using too much water on regular cardstock and heavy brushing of colors will eventually cause the cardstock to lose its integrity and start to cause "paper balls" - you know, little rough spots on the colored areas. Furthermore, the cardstock will warp when it dries. Yuck!


Colored pencils are a great way to color in images but it's VERY TIME CONSUMING and difficult to blend. I found that the most ideal medium to color in images is chalk because it's blendable and quick. The only drawback is unless you use glossy cardstock, it's difficult to blend and the color application is not consistent on regular matte cardstock. Blender pens can be used to blend the pastel but it gives the same effect as markers but less bold. Glossy cardstock can be expensive at times if you don't find it on sale and it's not heavily marketed as regular cardstock, therefore, difficult to find.


Here are two samples using the same images. The first one is colored in with chalk. To color in the entire image took me approximately 20 minutes. The 2nd image was colored in with pencil and it took me approximately 40 minutes to complete. I do take a long time coloring images because I blend the colors in thoroughly - I don't just color the image quickly. I use cross-hatch techniques and circular motion to blend the colors. As with both images, I highlighted the images outline with markers. See if you can tell the difference between coloring with chalk versus coloring in with pencil. Personally, there's only a fine difference between the two.


This was colored with pastels (chalk)


This was colored with Pencils

Thursday, November 16, 2006

Product Review - Versamark Ink


Versamark ink is a very versatile ink pad. Here are a list of techniques you can do usingVersamark ink.


  • 1. Ink up the stamp of your choice with the versamark. Now, without cleaning the stamp, ink it up with a color of dye ink of your choice. Stamp, use the desired translucent or clear powder of your choice. And heat. This will not hurt your colored ink pad.

  • 2. Batik technique — simply stamp your image using versamark on ultrasmooth white or confetti or some other light cs and then emboss with clear embossing powder. Let cool. Then gently wad paper into a ball or you could fold it into a small square for a different look. Unfold it and smooth it out. Place it on a towel and wet with water so the paper is very damp. Next ink your brayer with a kaleidacolor pad and brayer across the paper. The image will stay white while the ink will seep into cracks and the rest of the paper will have a batik look.

  • 3. Brayer resist- this technique can be done with gold encore or versamark pads. Stamp the image onto glossy white card stock using one of these pads (you can also use matte card stock, but it works better with glossy). Gently wipe away the ink using a lotion-free tissue and small circular motion. Ink up your brayer and roll it over the paper. Wherever the versamark ink was stamped, the paper will resist the colored ink from your brayer.

  • 4. Cleaner- rub on your craft & rubber scissors and it will keep them from getting all gunky with sticky stuff.

  • 5. Clear emboss resist — use it with clear embossing powder on white, vanilla, naturals, confetti, kraft or any soft colored paper. Then sponge over the clear embossed image and watch it pop out.

  • 6. Discreet journaling lines- although the versamark ink is sticky when applied, it dries like regular ink and looses its stickiness. It is acid-free and safe for scrapbooking. It works perfectly on all colored cardstock.

  • 7. Emboss with your dye ink pads - ink your stamp with versamark, then stamp on a dye ink pad. Stamp and use clear embossing powder. Heat. You have now created perfectly coordinated with the markers and card stock. Don't forget to clean your stamp before re-inking on versamark pad or you will leave color on the pad.

  • 8. Embossing brads — another great use for versamark... Take a brass fastener, pinch it in a clothes pin, dip the head in versamark, then dip in embossing powder, heat with heat gun, while powder is still wet, dip again in embossing powder & heat one last time. After it cools down you will have a nice enamel type colored coating on your fastener.

  • 9. Embossing on glass- use the embossing buddy first, then use the versamark to stamp the image on a glass container, then emboss with detail gold or silver. Fill it with candy and tie a ribbon on it.

  • 10. Embossing- use it as an embossing pad with any colored embossing powders.

  • 11. Full coverage embossing — brayer with the versamark over a stamped image and use Stampin Up glassy glaze embossing powder. This will give you an all over gloss. Repeat till it is the thickness you want.

  • 12. Glossy card stock resist- stamp on glossy paper and then brayer over the top with a kaleidacolor pad . This is called resist.

  • 13. Heat & stick — use it with heat and stick powder to add glittery glitz or flocking to any project.

  • 14. Poly shrink — use it on poly shrink projects. After you shrink your item press it into the versamark pad. Add the clear or transluscent powder of your choice and heat. Repeat till you get the thickness and look you want.

  • 15. Poppin' pastels- stamp with the pad and then rub pastels over the it. The versamark will hold the pastel and "pop" it out.

  • 16. Preserving children's hand prints — versamark is a great pigment ink to use on little kids' hands to make embossed hand prints, because it is clear and cleans up easily. Grown-ups should do the embossing of the sweet little hand prints since the powder can be messy and the heat gun is hot. But let the little ones watch their handprint turn to gold or silver before their eyes — they love it! And i'm sure you can imagine how the moms, dads, or grandparents will love their precious one's little handprint preserved in gold!

  • 17. Pullin' pastels- rub your pastels over the dark card stock. Then stamp your desired image over the top of that. It will pull the pastel off and leave the image behind.

  • 18. Reverse pastels- use brightly colored chalk to cover dark colored card stock, and then stamp over the chalked area. The ink will pull out the color of the paper from beneath the chalk.

  • 19. Shadowing- this is a technique to use with kaleidacolor pads and word stamps but you can use it for anything really. Just stamp directly over your first image. Because you will seldom be exact you will make a shadow that gives the initial image a 3-d effect. You can even take it a step further and emboss with a translucent powder like pearl or iridescent ice.

  • 20. Soot stamping — hold glossy card stock over an oil lamp with the flame turned up high to leave deposits of soot on it. Using a clean stamp, ink it with the versamark pad and then stamp on the soot. The stamp removes the soot and leaves a bit different effect than if you stamp with just the bare rubber. Be sure to clean stamp in between each time you stamp on your soot project so you won't get any of it on your vm pad. You must then spray with a fixative.

  • 21. Versa mark and pearl ex powder resist. Use vera mark to stamp on dark colored card stock then brush over image with pearl ex powders. Seal with clear sealer.

  • 22. Versamark and 2-step stampin'- stamp the image first with versamark pad and then with metallic (encore). Just shift a little bit when stamping the metallic ink. This creates a shadowed look.

  • 23. Versamark is for kids!! Versamark is a great kid's inkpad. Just let the little ones stamp their little hearts out without ever worrying about an ink mess on those precious little hands or faces or table . . . Or anything else for that matter! It doesn't stain the wood on the stamps either. Encourage your young ones to watch for the "magic ink" . . . Just a second of waiting and they will see the image magically appear. This is great for elementary students in a classroom sitting too.

  • 24. Watermark- stamp it on paper and you will have a watermark. This is very subtle, but lovely, on black white or vanilla paper as well as all of the other colors.

Word Window Christmas

I actually had a great time making these cards.


Making these two word window cards wasn't difficult but it was time consuming because of the work on the Poinsettia. Instructions below will be primarily on how I created the poinsettia. The picture is sort of self-explantory in regards to the rest of the card. If you have any questions, feel free to email me and I will gladly answer your questions.

Instructions for the Poinsettia:

Tools and Materials

Stampin Up Poinsettia Greetings stamp set
Red Cardstock
Green Cardstock
Scissors
Glitter
Stampin Up Borque Burgundy craft ink or any burgundy pigment ink
Stampin Up Forrest Foliage craft ink or any dark green pigment ink
Clear glitter embossing powder
Heating tool
Green Ice stickles (glitter)
Foam Tape

Instructions:


  • Rubber stamp 4 images of the poinsettia on red cardstock using Stampin up Borque Burgundy craft ink or burgundy pigment ink
  • Cover all the images with clear glitter embossing powder
  • Heat with heating tool
  • Set aside to cool
  • Cut out along the edge of the inner row of petals of the poinsettia- doing this with two of the images
  • Adhere the cut image on to each of the two other uncut images with foam tape

  • Rubber stamp the poinsettia on green cardstock using the Stampin Up Forrest Foliage craft ink or green pigment ink twice - it's not necessary to ink and stamp the whole image, just as long as the most inner petals and berry image are stamped. As an alternative you may use a green embossing pen to ink the stamp image at the inner most row rather than inking the whole image.
  • Apply clear glitter embossing powder and heat
  • After cooling, cut out the most inner rows of petal and glue on to the duplicate image of the poinsettia mages on the red cardstock.
  • Repeat the process with the other green poinsettia to create two completed poinsettias for the card
  • Apply dots of green glitter on to the center of the poinsettia
  • Adhere the completed flowers on to a designed base card

  • Cut a few of the outer petals of the green poinsettia image and adhere between petals of the completed poinsettia as shown in the picture.

Be creative with the background. Each person has their own unique style of creating a card. Personally, I like using scrapbook paper for my background because it adds vibrant colors to a card design that rubber stamped backgrounds cannot duplicate. Furthermore, it's a fast and simple way to create a beautiful background.


The Stampin Up word window punch is a cool tool.

Technique using the Window Word Punch or any shaped punch.

  • Punch your cardstock using the Word Window Punch or shaped punch. The Poinsettia cards were punched with an oval punch.
  • Behind the punched window, stamp a sentiment on a different colored cardstock and attach to the punched cardstock so the sentiment appears through the punched window.
  • To give it a bit of dimension, mount the punched window with foam tape as shown in my sample cards.

Have fun creating!!

Until later. . .

Tuesday, November 14, 2006

Made 2 Cards. . . Whoohoo!!

I actually made two cards this evening and they turned out okay. I will add it to my post tomorrow morning. I have so many things to do tomorrow. I feel a little overwhelmed. I will try to remain focused. My problem is that I need to be more organized and not be so ADD. I think I'm slightly ADD but have not been diagnosed. Ha! Sometimes I do feel I have a problem focusing for long periods of time.

Until tomorrow!

Day of Nothingness

I did not make any cards again today. Once again I don't know where my day has gone. I woke up early, drove the kids to school, came home, contractors came over to evaluate how to fix our intercom system, packaged a few items to mail, went to the store to buy printer ink, went grocery shopping, picked the kids up from school, started cooking dinner, and now here I am. I can't believe that it took my whole day to do basically nothing substantial. It appears that my days seem to be filled with these sort of "nothingness" and amazingly, I don't have time to make cards.

I wonder how I did it when I was working full time? I mean I can't figure it out. I still found time to make cards when I was working. It's really weird.

Glittered Window


I really enjoyed making this card mainly because it was quite easy. I like making cards that are easy to create but appears difficult and a lot of hard work went into it. The glittered window is one of those techniques that looks complicated but really is not.

Instructions

Tools and Materials:

Red Cardstock
Green Cardstock
White Cardstock
2 different patterned scrapbook paper
Clear glitter
Clear packing tape
Brads
Ribbon
Gold metallic cord
Belt buckle die cut (optional)
1 inch circle punch
2 inch circle punch
Small hole puncher
Ornament rubber stamp that will fit in a 2 inch circle window
Black dye ink
Red and green markers
Pastels
Transfer tape
Foam tape

Instructions:

  • Create a card base using red or green cardstock 4 1/4 x 5 1/2 inches
  • Cut a scrapbook paper to 4 1/4 x 5 1/2 inches
  • Cut 2 ribbons 4 inches and 3 inches long
  • Attach a belt buckle die cut or whatever type of belt buckle you have (opitonal) to each end of the ribbon as shown in the picture. If you don't have a belt buckle, simply tie the two ends together to create a small bow.
  • Tape the exposed ends of the ribbon to the back of the scrapbook paper keeping the buckle or bow portion slightly to the right of the scrapbook paper (see photo)
  • Glue on to card base
  • Punch a tag using a 1 inch circle punch and rubber stamp a sentiment
  • Punch a hole at the top and insert a gold metallic cord
  • Attach to the bow or belt buckle as show in the picture
  • Set aside

  • Cut a 3 x 3 inch scrapbook paper (different design) and mat over a green cardstock about 1/8 inch larger around the edge.
  • Punch two holes to left corner
  • Insert two ribbons to each hole and tie them
  • Glue on to top half centered of the other scrapbook paper (see photo)

  • On a white glossy 2 1/3 x 2 1/3 cardstock, rubber stamp ornament in the center with dye ink
  • Color image with pastels
  • Outline ornament with green and red markers
  • Mat on green cardstock about 1/8 inch larger around the edge
  • Set aside

Glittered Window instruction:

  • Cut a red cardstock by 2 1/3 inch squared
  • Punch a 2 inch circle in the center
  • Using the clear packing tape, tape over the circle completely exposing the sticky side on one side of the cardstock center
  • Apply clear glitter over the exposed sticky side
  • Punch small holes to all four corners of the cardstock
  • Insert brads
  • Apply adhesive to edge of the cardstock (exposed glitter side up- meaning apply the adhesive to the side that you see the tape and not the side where the glitter is exposed)
  • Attach to matted image - align exactly to the white cardstock
  • Attach the whole designed image over the 3 x 3 inch matted scrapbook paper using foam tape

I know it sounds complicated but when you are actually doing it, it's really not complicated. Try it out and let me know what you think.

Monday, November 13, 2006

Product review - White Cardstock

White Cardstock - Georgia Pacific

When I first discovered rubber stamping. . .well, I was "brand name" happy. I thought the only products that I could use had to be a brand that is related to rubber stamping. Well, I learned a few things through my journey in the rubber stamping world.

Walmart. . .yes, Walmart is a great source for rubber stamping and scrapbooking products. They are limited in what they sell but they do sell a few items that are worth taking a look at.
Did you know that many brand name companies sell their products to Walmart and sometimes, repackage them with a different name or sometimes they don't. For example, EK success sells their products at Walmart and it's about 1/3 the cost of those sold at craft stores.

Brads and eyelets are sold at Walmart in 500 to 750 packs and cost less than $10.00. I believe I bought a 750 pack for $6.50. Making Memories sell their multi-pack of 600 eyelets for $19.99 at Joann. Okay folks, who cares what brand of eyelets you use on your cards. . . .an eyelet is an eyelet unless you are looking for a specific color. . .then who cares, right?

Anyway. . .back to my product review. . .

Walmart carries a ream of white cardstock by Georgia Pacific (ream of 150 - 8 1/2 x 11 sheets) that are 110 lb weight for $6.00. Unless you are planning to watercolor, this cardstock looks and feels like any other cardstock sold at the craft stores that are twice to 3x more expensive. At Micheals and Joann, a pack of 50 sheets cost about $4.99 and trust me, I can't tell the difference. . .as a matter of fact, the ones sold at the craft stores - are thinner and of lesser quality.

You can do light watercoloring on this cardstock because it's heavy enough to do so but if you are planning to layer the colors and use water heavily I don't recommend doing so on this cardstock. Single layer watercoloring is fine - it won't warp the paper once it dries and the integrity of the cardstock remains intact.

Check it out when you have a chance! Believe me, you'll never buy plain white cardstock at the craft store ever again.

Unproductive Day

I didn't make any cards today. I started off ready to go but everything else got in the way. My craft room is a mess and I can't stand the way it looks right now. When my room is messy, I can't concentrate. It bugs me like crazy. It's almost 6:00 p.m. Geez, where has the day gone? It seems the days are going by faster. I wake up early in the morning and all of sudden it's time to go to bed. It's like a flash. . .and it's not like I'm a very busy person. Imagine when I return to work. . .right now, I can't even imagine it's possible to make cards when I return to work. I can't even squeeze in time to make cards when I'm not working so how will it be possible when I am.

I still need to wash the laundry and clean this room up. I guess I won't make any cards today. I wonder. . .when a person gets older, does time seem to go by faster? I wish it would slow down a little. . .there's too many things in life to enjoy.

Until later. . .

Sunday, November 12, 2006

Marshmallow Reindeer

I love this stamp. I created these cards using the same technique as the "Marhmallow Penguin" - see my previous post. The only differerence is I did not restamp the image on scrapbook paper. The image was rubber stamped on glossy cardstock, colored, then heat embossed with clear embossing powder.


Advise on selling handmade cards

Making cards to sell is a great business if you can develop a client base that buy from you regularly. There are a few things I've learned after selling cards for the past 2 years, here are a few of them:

  1. Each customer has a particular taste in design and type of cards they like to purchase. This is important because when buying stamps and other products to create your cards, you need to have a variety of design and styles to accomodate your customers.
  2. It appears technique is less important to some customer. If they like a particular stamped image, I found that it really doesn't matter if you colored it with pastels or pencils and did nothing else to it but color it. You can spend hours creating a card with various complicated technique and the card won't sell any faster than if you created it with a simple technique.
  3. If the customer is also a rubber stamper, then technique and design may be more important than the stamped image to this particular customer. These types of customers buy your card because they want an example of techniques so that they can re-create the cards themselves.
  4. The two previous notes leads to this advise: Know your customers and why they are buying your cards.
  5. Customers don't know how long it took for you to make your cards unless they make them themselves. As a matter of fact, many don't care if it took you 5 minutes to create a card or 3 hours. Keep things in perspective. . .many don't understand the process of making cards so don't feel offended if they don't buy the more heavily "technique" driven cards.
  6. Sometimes it is more profitable to make cards that are the simplest to make but use quality stamps and materials when creating these simple cards.
  7. Buy quality rubber stamps. It can make your job easier when creating a card design. A very nice rubber stamp can make even a simple card pretty without any other additional embellishments to make it nice.
  8. Know the cost of each components of your card, down to that single brad or ribbon. Keep also in mind the cost of the glue, tape, ink, envelope, etc. These things add to the cost of creating the card.
  9. Sell your cards at a lower rate than your competitors if possible. It's more important to have repeat customers who will buy more than one card from you as opposed to one customer who will buy that one pricey card. You may have profited more on that one card but if your card is too expensive, you may not sell many of them in the long run.
  10. Always buy bulk when purchasing cardstock, scrapbook paper, embellishments, etc. It will help to keep your cost low and provide you with various materials to create different design elements to your cards.
  11. Don't focus on buying "designer" or "brand name" products unless they are the only ones that sell that particular type of product.
  12. Buy tools that will allow you to create various design elements to your cards. Concentrate on buying big ticket items on tools. In the long run it's a great investment. You will only need to buy it once even if it's expensive but if it provides you the means to create various designs to your cards, then it's well worth it.
  13. Many customers buy handmade cards because they like the idea of buying a card that is "one of a kind". Be careful about making "bulk" sets of cards. For many customers, it's less appealing to buy a card where there are multiple sets of a particular card design. Make bulk sets if a customer request it.
  14. Most important of all make cards because you enjoy making them. . .if the focus is to sell them, you will burn out in no time and the idea of creating cards will become more of a burden rather than something fun. Ultimately, you'll get tired of making them.
  15. The truth about selling handmade cards: You won't make a lot of money selling handmade cards, especially if you factor the time it takes to create them so if you are realistic, the sale of your cards is just a little bonus. Make cards because you enjoy making them whether it sells or not.

Hope this list helps you understand the business of selling cards. . .especially, if you've been thinking of starting a handmade card business.

House Mouse Again

I really love house mouse stamps. So. . .I bought 2 new Christmas House Mouse stamp. I love these stamps. . .they're really cute. I used paper glaze or dimensionals (SU Crystal Effects in this case) and covered the ornament to give it a glassy appearance. I also did the same thing with the candle holder and candle. These stamps are perfect for this product.


Check out the House Mouse Website by clicking on the title of this post. It's linked to their site.

Saturday, November 11, 2006

Slide Show

Gosh it took me several hours to figure out how to embedd the slide show on to my blog. The different slide show layouts were too large to fit completely on to my blog layout. I tried to adjust the width of the layout so that it would fit but I did not know which html code applied to what part of my layout so whenever I would adjust the html codes it would mess up my layout.

I decided to put the horizontal slide show at the top rather than a square one on the side of my layout - which was what I preferred. I had no choice but to put the horizontal one at the top. It doesn't look bad up there. . .it show case my cards so it's all good.

Now that I'm done, I now can concentrate on making cards and rubber stamping rather than messing with this blog.

Until later. . .off to making cards I go!!

Friday, November 10, 2006

Personal Challenge

I've decided to make a card with different sketches each day. I will post each card I make. . .now I need to figure out how to upload the sketch drawing. I'm new with this blog thing so I'm still learning how to use all it's features.

I wish it was simple to upload pictures. There must be another way to do it without having to have my photos hosted by another company then writing it in "html" on this blog. I've spent so much time trying to figure things out that I haven't had time to make cards!!!!

Until later. . .

Back to Stamping

Well I made a bunch of cards last night and this morning. I had fun creating these cards mainly because I made cards with different sketches. It helps to have an idea of the card layout before creating the card. It makes things easier.

Here are cards using the Stampin Up "Song in your heart" stamp set. Crystal effects were used to create a 3D appearance of the images. The picture don't really show this effect.


These cards were created with Stampabilities "Marshmallow Penguin" stamp.


Instructions on the image only:

Tools and Materials
Stampabilities "Marshmallow Penguin" stamp
Glossy White cardstock
Black dye ink
Black, russet, and blue markers
Pastel
Scrapbook paper
Versamark ink
Clear embossing powder
Heating tool

Instruction:

Ink stamp with black dye ink and rubber stamp on to glossy white card stock
Color penguin body with black marker
Color penguin cheek with pink pastel
Color penguin nose with russet marker
Ink the whole image with Versamark ink
Heat emboss with clear embossing powder
Cut out penguin image and set aside

Ink stamp with black dye ink and rubber stamp on scrapbook paper
Cut out scarf and hood
Glue on to embossed image

Ink stamp with dye ink and stamp image on to patterned paper
Cut along the edge of the whole image
Attach penguin image on to penguin image stamped on patterned paper with foam tape


Design the rest of the card with your own creativeness

The same technique was used to create this card:

Wednesday, November 08, 2006

Back in the groove

I think I'm over my creative slump for the day. I'm back to feeling enthusiastic about creating cards. I think I was feeling a little tired and felt a bit moody. I did make a card last night right before I went to bed and it came out the way I wanted it so it brought back good feelings again.

Sometimes the finished cards reflect how I am feeling. When I don't feel good, my cards are not as creative . I don't want to work on the card too much and I resort back to what is most easiest or least creative. . .just because I don't feel like working on a card.

Anyway, tonight I'm going to make a few cards . . .I'm going to try out a few different sketches. We'll see how it goes.

Until later. . .

Who doesn't love House Mouse and Fat Cats

I love making cards with the House Mouse and Fat Cat series. House Mouse is created by various stamp companies but the ones that I own are by Stampabilities and the Fat Cats are created by Penny Black.

The detail of the stamps are beautiful. . .a real work of art. No matter what you do to the card, because of the beautiful images, the card turns out nice. You don't need to be an expert card maker or rubber stamper to have beautiful results.

Here are a few cards I've made recently using House Mouse and Fat Cat stamps:


Tuesday, November 07, 2006

Tying a knot/bow (this is great)


I tested it out and it's awesome. I never could tie a knot or bow on my card without it looking sort of off centered or flipped in the wrong direction. I love it! I'll post a picture of a card I made using this knot/bow technique.

If you look hard enough, you will find the answer. . .

Here is the card that I made using the knot/bow technique:


Card Instructions:

Tools and Materials

Burgundy cardstock 7 x 10 inches
Beige cardstock 4 1/2 x 5 1/2 inches and cut a mat card 1/8 inch larger
Olive cardstock 5 6/8 x 4 6/8 inches
Beige cardstock 3 4/8 x 3 7/8 inches and cut mat card 1/8 larger
Red and green cardstock
Green eyelets
Stampin Up Christmas Foliage stamp set
Any sentiment stamp
Tim Holtz walnut distress ink
Stampin Up old olive craft ink and dye ink or any brand
Stampin up really rusty dye ink or any brand
Stampin up creamy caramel dye ink or any brand
Black dye ink
Embossin ink pen
Versamark ink
Marvy green and burgundy markers or any brand
Garnet embossing powder (any brand)
Egyptian gold embossing powder or any gold embossing powder
White embossing powder
Clear embossing powder
Heating tool
Eyelet tool
Foam tape
Glue or adhesive
5/8" organza ribbon
Corner punch (any design)
Crystal Effects or any dimensional glue
Burgundy ice stickles glitter

Instructions:

  • Create a 5 x 7 inch base card with the burgundy cardstock
  • Set aside

  • Using the 4 1/2 x 5 1/2 inch cardstock rubber stamp large pine leaf randomly using the old olive dye ink, then ink the stamp with old olive craft ink and stamp over the already stamped image. It's not necessary to stamp over the image exactly. . .slight variant to alignment is preferred.
  • Heat emboss images with clear embossing powder
  • After embossed images are dry, highlight images with clear embossing pen randomly over parts of the pine leaves
  • Heat emboss with white embossing powder
  • Rubber stamp pine cone with really rusty dye ink adjacent to already stamped pine leaf images
  • Stamp "squiggly" pine cone image using creamy caramel over the already stamped pine cones
  • Ink pine cone image with Versamark ink, stamp over the already stamped pine cone images - don't need to be exact
  • Heat emboss with garnet embossing powder
  • When dry, highlight pine cones using clear embossing pen
  • Heat emboss with white embossing powder
  • Ink pine cone image again with Versamark ink and stamp over pine cone images
  • Heat with garnet embossing powder
  • Using walnut distress ink, highlight edge of the cardstock and randomly around the stamped images
  • With corner punch, punch the four corners
  • Mat on to beige cardstock
  • Adhere to left side of 5 6/8 x 4 6/8 inch olive cardstock
  • Set aside

  • Rubber stamp pine leaf on to 3 7/8 x 3 4/8 inch beige cardstock three times randomly to top right corner using old olive craft ink
  • Heat emboss with clear embossing powder
  • Highlight edge of cardstock with walnut distress ink
  • Corner punch all 4 corners
  • Mat with beige cardstock
  • Add green eyelets to the corners
  • Tie bow around the lower horizontal half of the card
  • Attach with foam to right center of the background image as shown in the picture

  • Rubber stamp sentiment on to olive cardstock using black dye ink, mat with beige cardstock and attach to left side of cardstock
  • Rubber stamp 3 poinsettia image using Versamark ink then heat emboss with egyptian gold
  • Color inner outline of poinsettia image with burgundy marker
  • Apply burgundy stickles glitter to center of poinsettia image
  • Apply crystal effects to poinsettia image (do not apply to embossed area)
  • Set aside to dry

  • Rubber stamp 2 poinsettia leaf image with Versamark ink
  • Heat emboss with egyptian gold embossing powder
  • Color inner outline of the leaf with green marker
  • Apply crystal effects to the leaf avoiding the embossed area
  • After both poinsettia and leaf are dry, attach to top left corner as shown in the picture using glue and foam tape. Layer the images as shown in the picture.

  • Apply assembled design on to card base

Taking a break

I did not make any card today. This is unusual for me but the last few days, I haven't been in the mood to do so. I've been having somewhat a creative block. I've been doing this for so long on a daily basis for several hours a day that I think I'm beginning to burn out a little bit. I need to step away from this for a little while.

I've had episodes such as this on several occasion and I usually come back feeling refreshed and the creative juices start to flow again. During these dark moments I start to wonder if I should stop and sell my things. I've invested a lot of money on my rubber stamping and sometimes can't control my need to buy more things. Then when I go through a creative slump, I start to feel that I'm nuts that I've bought so many rubber stamping stuff and start to feel guilty about how much money I've spent on this hobby.

I know I'll get over this period. . .I just need a few days rest.

Until later. . .

Sunday, November 05, 2006

Page Map/Card sketches

http://www.pagemaps.com/

Click on the title of this post and you will be directed to a fabulous website for card-makers. If it doesn't link you directly to the website, copy the above URL and paste it to your address section and click "go".

The above website is a link to page maps or card sketches that you may use to help organize your card design. Sometimes I get stumped when creating a layout for my cards and these maps/sketches provide me inspiration to create something I would not have initially thought of.

When I have the time, I'm going to start creating my own and post it on this site. Right now, I'll just post the link to this site. I have to figure out how to add a box for links to other resources on this blog site. I haven't had a chance to explore how to navigate this blogging site.

My other goal will be to post daily lessons or daily samples of cards I've made. I want to teach a rubber stamping class at my house but my husband don't want "strangers" over to our house. At our last house, when I suggested that I start rubber stamping lessons, he said I could if we sit outside in the patio. I nixxed the idea because it would be difficult to bring all of my tools, stamps, and papers outside just to have the wind blow and everything starts flying. Over here in our new house. . .he suggested doing it in our garage. Maybe next year I'll clean up the garage to the degree that it would be comfortable and presentable for other ladies to come over and make cards. I would prefer to do it on our dining table inside of the house once a month. What's the harm in that, right? We'll see.

Anyway, here is the website for the page maps which includes scrapbooking maps as well as card maps. Check it out. . .it's a great site.

Saturday, November 04, 2006

Frustration

I have a special order to make 5 cards. Unfortunately, the images are very detailed and require very detailed coloring. I colored all the images and all went well. I began to apply the glitter and glaze over the image. That's when the horror began.

First, the glitter began smearing the ink and the outline began to look like a blur of black something. Ahhhhhhh! So. . .I restamped portions of the image on a different type of cardstock. I thought it could have been possibly the card stock that caused the glitter to bleed the ink. I recolored the images, cut out portions of the images that I wanted to use to cover up the "mess". I re-attached them to the areas I wanted to covered up.

At this point I began to notice that the cardstock that I had stamped the images began to look a little warped. I didn't think anything of it at first. I thought if I attached a mat they would straighten out. So I matted all the images. . .and continued to press forward.

I completed the cards and ahhhhhhhhhhhhhhhhhh!! areas of the image began to unglue off the mat and began warping again. I would press one end and the other side would pop off the mat. I couldn't believe it. I kept smoothing them down with my fingers with no succes.

I decided to give up and start over this time using heavier cardstock in hopes the cardstock would not warp and bleed. Well, I've completed the coloring, applying the glitter and glaze and I started to notice the images bleeding again. I COULD NOT BELIEVE IT. The bleeding weren't as bad as the other ones that I decided to continue forward.

Anyway. . .I'm finally complete with the third attempt and I hope this time will be the last time. We'll see when it dries. . .I'll update on my next post.

Till later.

Update:

Here are the cards. These are the fixed cards but imagine the detail work I had to redo. . .it's no wonder I was frustrated.

Christmas Card 1

Poinsettia 5x7 inch Christmas Card


Instructions:

Tools and Materials:


Green Cardstock
Red Cardstock
Light Green Cardstock
Large circle silver brads
White Glossy Cardstock
Green satin lined organza ribbon
Red metallic cord
Red Christmas patterned paper
White patterned paper
Paper glaze
Pink fine glitter (ice stickles by Ranger)
Green and burgundy marker
Stampin Up Season Sprays set
1 inch circle paper punch
Black dye ink
Gold metallic pen or gold leaf pen
Foam tape
Small circle punch

Instructions:

Cut Green cardstock to 10 x 7 inches, fold in half to create 5x7 inch card
Cut white patterned paper to 5 3/4 x 6 3/4 inches
Mat with light green cardstock

Cut red patterned paper to 3 x 5 inches
Mat with red cardstock
Punch small hole to right lower corner
Tie green organza ribbon in a horizontal fashion across the lower edge - insert
through the punched hole and tie
Attach to lower right corner about 1/2 inch to the bottom of the white patterned
paper and 1/4 inch to the right edge as show in the picture

Cut a different designed red patterned paper and follow the same direction as above
Mat with red cardstock
Punch a small hole to the upper left corner corner and tie ribbon
Attach with foam tape to left upper corner 1/2 inch below the top of the white

patterned paper and 1/4 to the left edge

Punch two holes to right and left corners of white patterned paper and attach silver
brads as shown in picture

Cut white glossy cardstock to 2 1/3 x 4 1/8 inch
Ink poinsettia image with black dye ink
Rubber stamp image on center of cut white glossy cardstock
Color leaves with green marker
Color berries with burgundy marker
Apply glitter to little flowers
Apply paper glaze to leaves and berries
Set aside to dry
After image dries, line edge of cardstock with gold metallic pen
Mat with green cardstock
Attach with foam tape centered on to upper layered red patterned paper

Paper punch 1 inch circle punch
Rubber stamp sentiment stamp on to center using black dye ink
Tie red metallic cord to top of circle tag
Attach to left lower corner of poinsettia image as shown in the picture

Attach entire design on to green cardstock base

Patterned paper design and color are variable. Choose any Christmas color paper design that you prefer.


Friday, November 03, 2006

Rubber Stamping

I can't believe I've been rubber stamping for 3 years now. I rubber stamp daily for several hours a day. I wake up wanting to create something. I've never had passion for something like I do with rubber stamping and making cards. I believe it's my escape, a form of therapy to cope with stressful periods and at times I simply do it to keep me from being bored. I wonder if other people nutty as I am about this craft do it for the same reasons.

Until a year ago, I thought I was the only one who was this obsessed about rubber stamping. After looking through several websites, I realize I'm not the only one and that there are others who are more obsessed than I am and have been doing this for longer than I have.

I've come to realize that I have so much more to learn and that I need to put in more effort in my cards. I've seen so many beautiful cards and they have motivated me to work harder on my cards. I've always rejected the idea of looking at other people's cards because I feel that taking ideas from others will mean I don't "own" my design. I need to be more open to the idea that learning from others don't mean that I'm not creative.

I'll end it here for now. I need to upload a few pictures of cards I've made so that I can post it on my blog site.

Until later. . .